Using Multiple Templates (Joomla 2.5)
Many times clients are interested in using two different templates for different pages on their site. Users can create a variety looks and styles for different pages by installing and assigning different templates. This article explains how to assign a template to a page that is not the current default template.
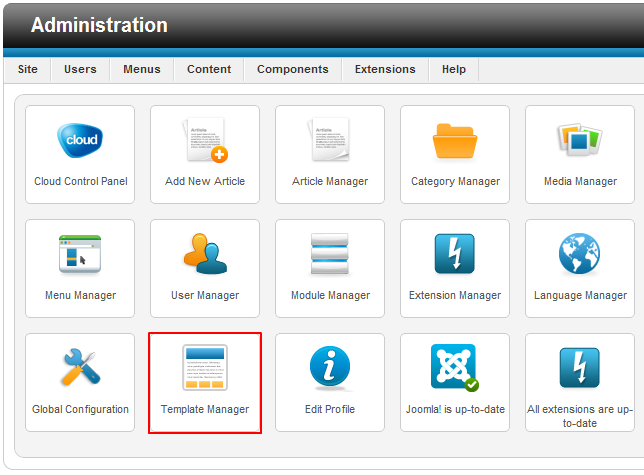
The first step is to install each template that you'd like to feature on your site. Learn how to install a template. Once each template is installed, go to the Template Manager to select a default template.
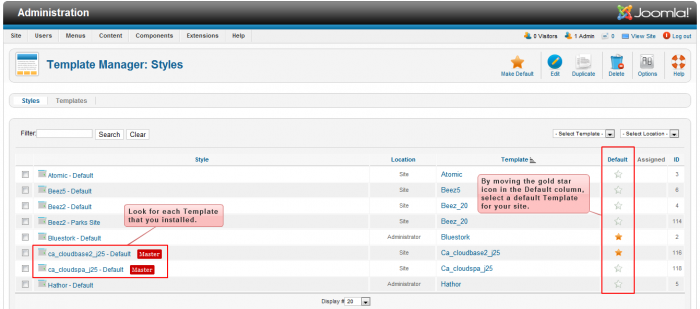
Be sure that each of the templates you'd like to use appears in the list of templates in the Template Manager. Using the golden star icon in the "Default" column, select a default template. This is the template that will be featured on all of your pages unless you select a different template for individual menu item (as explained below). For the purpose of this article, we will use the Cloudbase 2.0 template as our default template, and we will assign the Cloudspa template to select menu items.
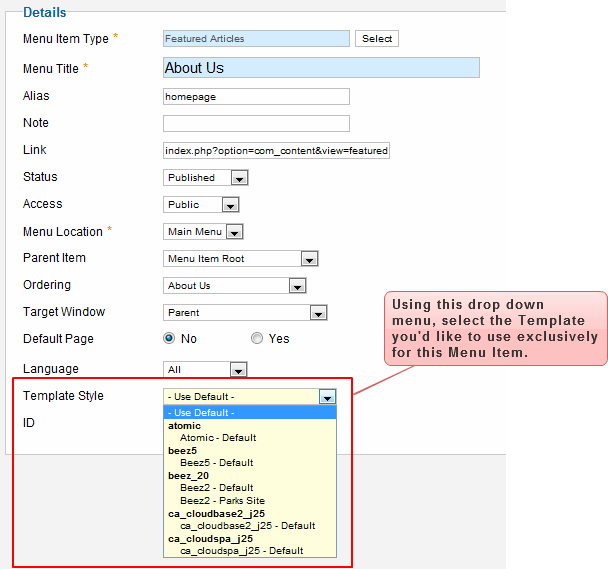
Next, go to the Menu Manager and open up the menu and menu item that you'd like to feature a template other than the default template. Once the menu item is open, there is a template style option in the "Details" area. Using the dropdown menu, select the template that you'd like to use exclusively for that menu item. Every other menu item will still use the template you selected as the default template. Be sure to save your work.
After saving your work, return to the front end of your site. Navigate to the menu item where you used a template other than the default template and you'll notice a difference.

Do you have suggestions for improving this article?
We take a great deal of pride in our knowledgebase and making sure that our content is complete, accurate and useable. If you have a suggestion for improving anything in this content, please let us know by filling out this form. Be sure to include the link to the article that you'd like to see improved. Thank you!


