Tutorial #12: Custom HTML Modules (Joomla 2.5)
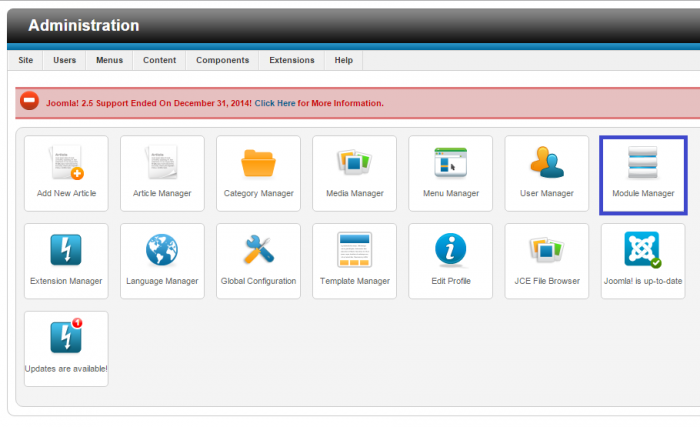
Modules are like little websites within your website. You can do many, many things with modules. You can feature contact, registration, and login forms. You can feature an RSS feed from an external resource. You can include custom text and images in various module positions. The opportunities are really endless and modules are versatile. The video below explains how to create a custom HTML module to feature custom text and images on your site. After logging into the back end of your site, go to the Module Manager. Before creating the module, it will be useful to visit the module map to pick a position for the module you'd like to create.
After clearing all content, you will still have the yellow caution message in the Module Manager stating that no modules match "your query". This message means that there are no active modules in your site. To create a new module, click on the "New" button in the toolbar.
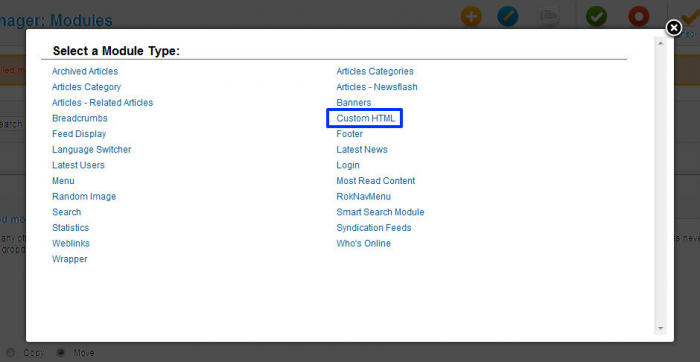
You'll be prompted to select a module type. There are many different types of modules and they can perform a wide range of functions. They are all worth learning about. To customize the content of the module, you'l want to select "Custom HTML" as the module type.
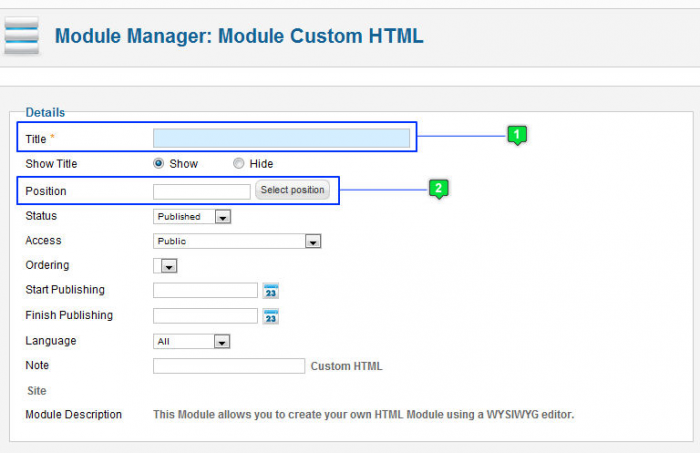
Just like creating a category, article, or menu item, you'll have to pay attention to red asterisks when creating a module. Create a title for the module, and you'll have to select a module position.
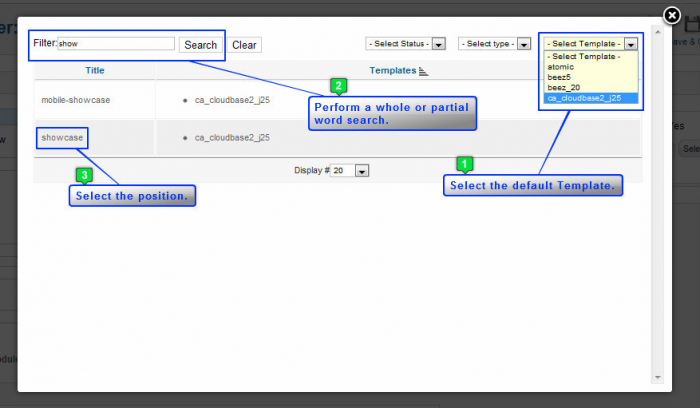
After you click the "Select position" button you'll be give a list of all the module positions available for each of the templates installed on your site. You can filter your search by selecting just the template you're working with and by performing a whole or partial word search. Once you find the position you picked, click on the position's name to select it.
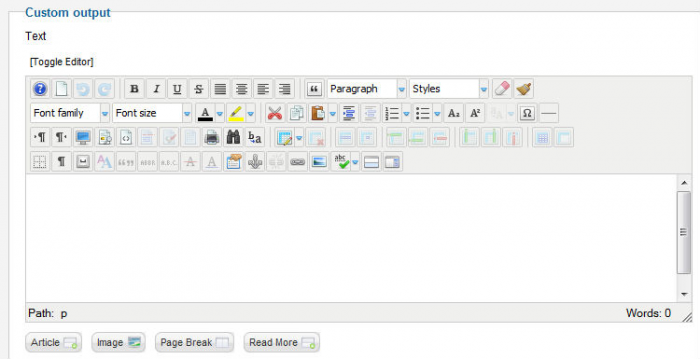
In the "Custom output" area, you can customize the text or insert an image. If inserting an image, it will be helpful to have pre-sized that image to fit the module before inserting the image.
In the "Menu Assignment" area, you can select the pages that you'd like to display the module.
Be sure to save the module when you're done.
At this point, return to the front end of your site, refresh the page, and you'll see your new custom HTML module.

Do you have suggestions for improving this article?
We take a great deal of pride in our knowledgebase and making sure that our content is complete, accurate and useable. If you have a suggestion for improving anything in this content, please let us know by filling out this form. Be sure to include the link to the article that you'd like to see improved. Thank you!


