Tutorial #10: Single Article Menu Item Types (Joomla 2.5)
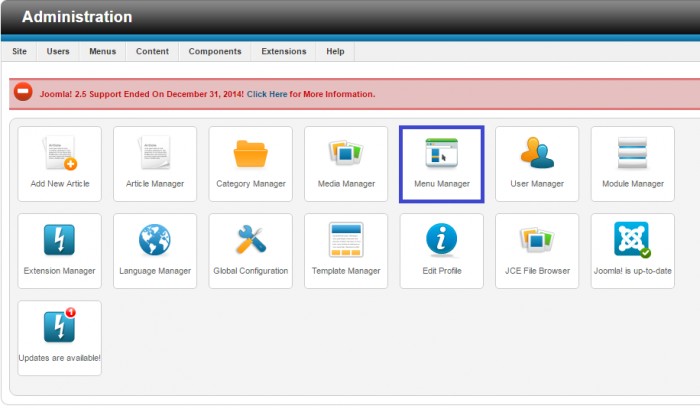
Before creating this type of menu item, be sure that you have visited previous tutorials on how to create an article so that you can link it to this menu item. To get started, log into the back end of your site and click on the "Menu Manager" icon.
Click on the "Main Menu" link to create a new menu item.
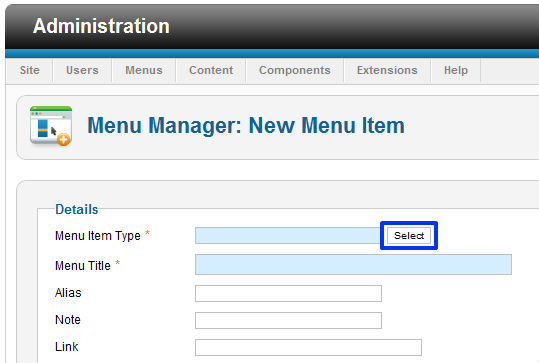
As you create a new menu item on your main menu, pay attention to red asterisks. You must select a menu item type. To choose the menu item type, click on the "Select" button.
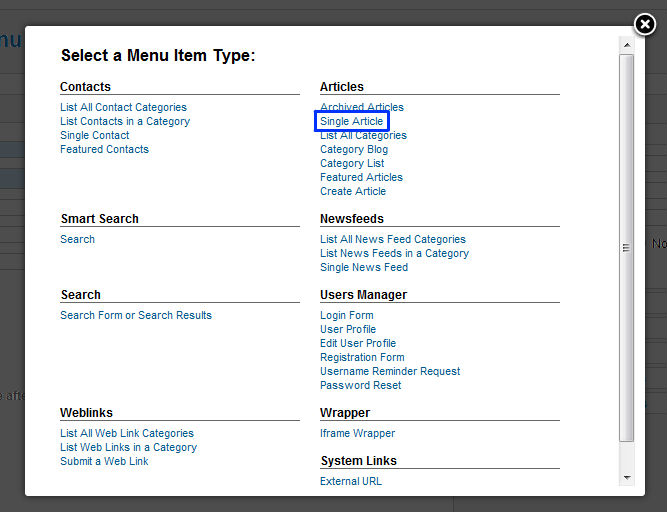
There are many useful menu item types and you'll want to learn more about all of them. Select "Single Article" from the list to continue.
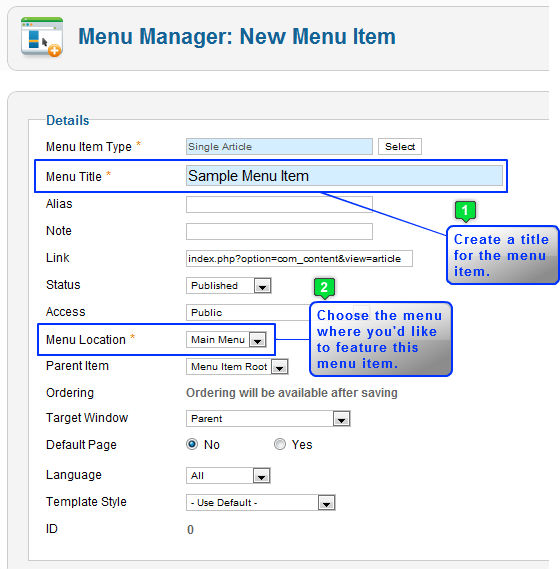
The next step is to create a title and select the menu location. You're only using one menu at this point so there will only be one menu location option (the main menu).
The step is to actually link the article you wrote to the menu item that you're creating. This is done in the "Required Settings" area. Click on the "Select/Change" button to link the article and the menu item together.
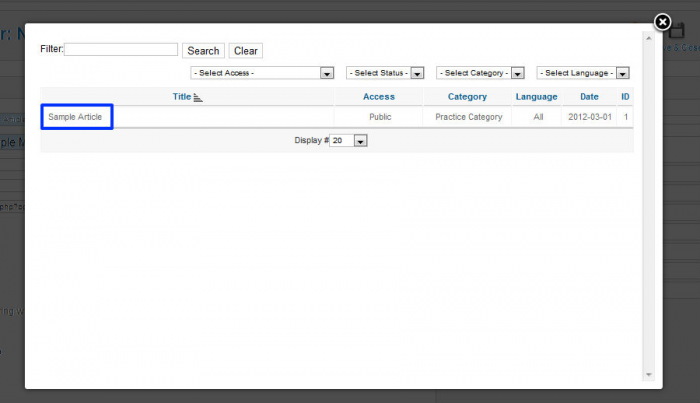
Select the article name from the list that appears.
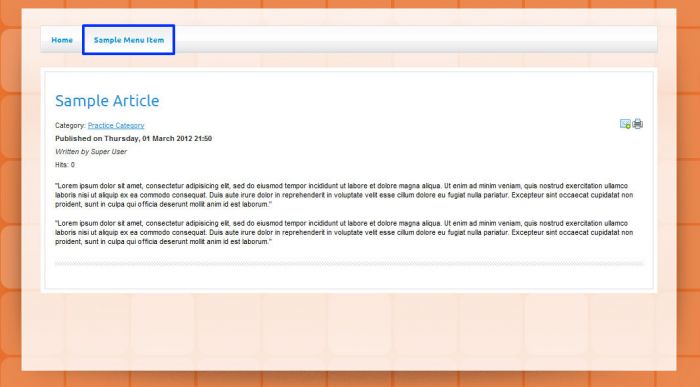
Select the "Save" button in the toolbar and return to the front end of your site. Click on the single item menu item you created to view your article.
You'll notice that there is additional information in the article like the category, published date, author, hits, and a few icons. The next tutorial in this series will discuss how to remove this additional information and how to download, install, and use the JCE Editor.
Back to Top

Do you have suggestions for improving this article?
We take a great deal of pride in our knowledgebase and making sure that our content is complete, accurate and useable. If you have a suggestion for improving anything in this content, please let us know by filling out this form. Be sure to include the link to the article that you'd like to see improved. Thank you!


