Offline Mode (Joomla 3)
At some point you may want to take your site offline as you make updates, upgrades, edits, or if you'd simply like the site to not be live as you develop it. The video below illustrates how to take your site offline so that it is removed from the public view, but still available for you to work on. An article with step-by-step instructions and screenshots follows. Before taking your site offline, please know that we have a Site Replication feature in the Cloud Control Panel™(CCP) that allows you to replicate any site to a staging area where you can update the site or test new features. Whenever the test is done you can easily move the production site back to the live site. This might be more viable than taking the entire site down as illustrated in the video below.
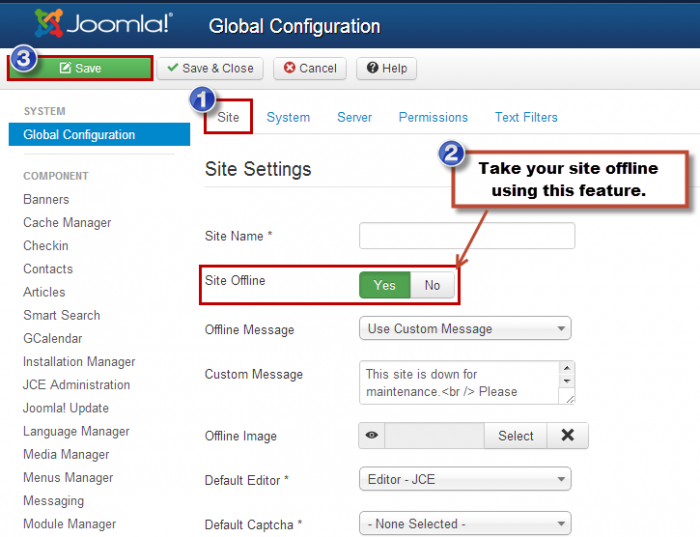
After logging into the back end of your site, go to Global Configurations. On the "Site" tab, under "Site Settings", there is a "Site Offline" Option. Simply click on "Yes", save your work, and go to the front end of your site.
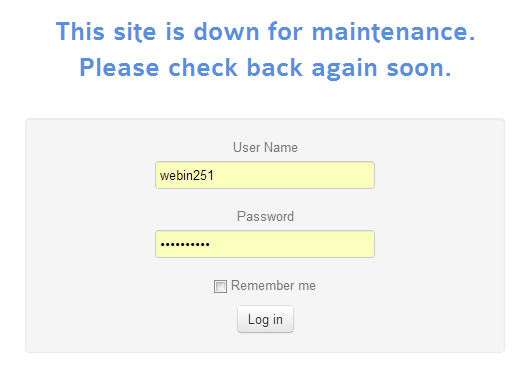
Your URL will now display a login form similar to what's seen in the image below. Site Administrators can log into the back end of the site here. Please note that this form may look different depending on the template you're using.
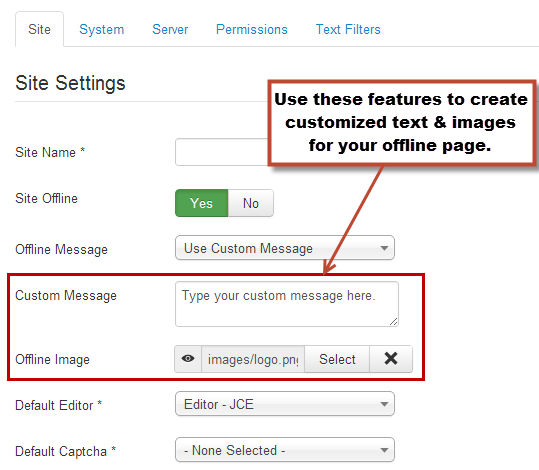
To customize the text of this page or to add an image, return to the Global Configurations area in the back end of your site. In the same place where you took the site offline, you'll see a place to create a custom message and to add an offline image.
Return to the front end of the site and refresh the page to see your custom text and image.
Back to Top

Do you have suggestions for improving this article?
We take a great deal of pride in our knowledgebase and making sure that our content is complete, accurate and useable. If you have a suggestion for improving anything in this content, please let us know by filling out this form. Be sure to include the link to the article that you'd like to see improved. Thank you!


